Showing posts with label planting seeds. Show all posts

Friday, 24 April 2015

Frugal Living and the Frugaldom Project


P1040277
Can you believe that I've been here for a fortnight, already? I'm well settled into the new home from home and finding it an extremely rewarding way to live, following work by the weather - outside when dry, inside when wet - it's the best of both worlds, even when the mundane stuff like accounts, website admin and other work needs to be done.
I am having the weekend off to make time for family visits, as the newest member of the family arrived on the 15th. My little ranch hand has already had his first visit to Frugaldom at the grand old age of one week! (Got to start them young so they learn to appreciate the land.) I also need to catch up with housework and paperwork.
230415_blackcurrants02
So far, at Frugaldom, I have managed to build 3 small fruit/veg beds - one for blackcurrants, the other two have strawberries planted in them for now. These are being made by loosely following instructions on a permaculture site, so they are truly recycled using old cardboard boxes, rotting wood, moss, composted woodchips and some soil/compost mix.
240415_strawberry_bed_02
It will all be slightly acidic as this was forestry at one point, hence the peaty soil, so I'm only planting things that can tolerate low pH conditions. I’ve got about 25 small strawberry plants so far and the same again still waiting to be planted. All of these were runners I potted on from last year’s plants, so free to me.
1991_poppies
I have sown many seeds, including all the GrowWildUK Scottish wildflowers, Woodland Trust poppies and some very old Californian Poppy seeds that a fellow frugaler sent to see if they were still viable, It will be interesting to watch for them germinating over the next year or two!
240415_barn_painting
H was here today helping out and managed to get another part of the barn painted - we still don't have big ladders to do the higher parts but I've spotted someone nearby who has a set, so will ask them nicely if we can borrow them. I'll need to rely on someone else to climb the ladders as my old knees/hips/back won't permit.
240415_toad_01The swallows are back swooping about and inspecting last year's nest, so I suspect they will soon be back in residence, around the corner from the bats. There are loads of frogs, toads, lizards, hairy caterpillars, butterflies, bees and voles about the place, but I've yet to catch sight of anything bigger. The cuckoos are very vocal in the nearby forest and there was a woodpecker down in the trees by the caravan this afternoon. I was also hearing of a close encounter with a barn owl and then we also have the red kite, white tailed sea eagle and plenty of buzzards in this area.
After a short delay, the tractor is being brought back on site tomorrow ready for the fencer to make a start on Sunday, so I'll probably end up back out at HQ on Sunday afternoon for a few hours - no rest for the wicked!
2ndcorral120415
It is great to think that corral #2 could be completed by early next week. I have already planted the rowans, silver birch and willow between the two and have surrounded the adjoining areas with grey willow, wild cherry and crab apple trees.  
With any luck, I may also see the arrival of someone to build my caravan decking very soon!
The Frugaldom home-from-home and Thrift Cottage combined weekly food bills currently average £6.33 per person and are based strictly on zero food waste, batch cooking, baking and plenty of eggs laid by our own hens and ducks. 
Since arriving on site, I have spent the grand total of £2.40 and am still pursuing my goal to bring the joint-household grocery bills down to £5 per person per week – you can see how that and other challenges are coming along in www.Frugalforums.co.uk 
The fine weather has now come to an end but the rain was badly needed. Having planted no fewer than 300 trees over the past week or so, the wild cherry and field maples in the dry areas were getting to the stage of really needing a good soaking and I didn’t relish the thought of going round the project with 180 buckets of water! 
I should soon be able to make a start on the mini-kitchen garden outside the caravan but will spend a couple of hours this weekend in the greenhouse at home, sorting out stuff there that needs to come here.
Don’t forget, if you’re in the neighbourhood, join us free as a member of the Frugaldom forums and find out how you can become a part of our woodland and market garden project.

NYK in Frugaldom

Saturday, 10 May 2014

Seedlings, Salad Stuff, Fluffy Chicks and Driftwood Sculptures

090514GardenProduce

Seedlings, Salad Stuff, Fluffy Chicks and Driftwood Sculptures

What a mixed bag of good old Scottish weather we have had recently! But Spring has well and truly arrived because we had our first rhubarb crumble tonight, made from freshly picked garden rhubarb. We also had garden grown salad stuff at lunchtime!

In the little greenhouse, the seeds are coming along well, with three varieties of sunflowers pushing ahead in the growing stakes. I have sown a fourth variety today and am planning a sunflower 'fence' halfway down the garden, if I can protect all of these from the slugs and snails. The cucumbers and courgettes are now beginning to germinate, too, so they'll be transferred into the polytunnel soon… read more here

Saturday, 12 April 2014

Frugal Blog - Seed Sowing and Recycling Fish Crates

P1000118

Scottish Multimedia | Seed Sowing and Recycling Fish Crates

Despite a cold, windy and wet start to the weekend, the rain eventually stopped and allowed us time to get out to play in the garden! The cheeky robin was delighted to see us digging and was soon down to help!

It was afternoon before I was able to venture out but I went prepared to do battle - gardening gloves, kneeling pad, hand tools, seed packets all in order - checked and double checked to see which could be sown outdoors in April, diary and pen, camera charged, egg carton of chitted potatoes, the germinated peas and lettuce seedlings from the window sill and last, but by no means least, I donned my golden wellies!

Weeding needed done everywhere I looked, so I started with… continue

Saturday, 8 March 2014

Day 8 of Making it in March - How to Make a Duck Eggshell Planter

Day 8 of 31 - Today we got our First Duck Egg of the Year!

White duck egg

Phoebe, our oldest surviving duck, has started to lay after her winter break, so today we had a lovely white duck egg. (I know it's Phoebe's because 'Custard Cream' lays pale green eggs and 'Oreo' lays blue eggs.) Cue an attempt at making one of those eggshell planters to hang in a home made mini macramé potholder.

Scoring the egg shell

I used a filleting knife to gently saw through the narrower end of the egg - don't cut right through, we want to save the egg inside for cooking!

Empty egg shell

Once sliced through enough to open the end off the egg, tip the contents into a dish or cup and put them in the fridge to use up for cooking. (Think I might make bread and butter pudding tomorrow!)


Wash out the shell before priming it

After giving the shell a good wash, allow it to stand upside down to drip dry and then give it a couple of coats of bonding - I used my PVA glue. This strengthens the shell. Omit this stage if you are planning on sowing seeds in it because once the seeds germinate, you can simply plant the entire egg shell into the ground.
 
Painting the eggshell

Once the bonding had dried, I used food colouring to paint this first shell a rosy red! I'll try different colours, depending on what I find in the baking cupboard.

Duck eggshell planter
 
I selected a brown embroidery thread and then knotted up another of the mini macramé hangers. (See earlier post for how to make these.) The colouring wasn't properly dried in time for me to plant up this shell for photographing, but I'll do that tomorrow. I have taken a couple more cuttings from my Money (Jade) Plant, so they should be ready to pot by then.
 
Turkey mince pie
 
And finally, for today, there were a couple of other makes! I made a batch of ice cream for daughter to take home with her and I made some pastry to turn some of the turkey 'Nile' mince into a pie to mark the end of National Pie Week! This one has turkey mince, sage  & onion stuffing and mixed vegetables already added to the filling. As usual, I forgot to photograph it when it came out the oven, so this is what's left of it. There is still sufficient mince to make another pie, so I've frozen that for future use. If I count a pie as 4 portions, my 400g pack of turkey mince stretched to 12 meals, six for each of us here.
 
NYK, Frugaldom

Friday, 7 March 2014

Day 7 of Making it in March - Making New Food Grow

Day 7 of 31 Days of Making it in March - Making Things Grow!

A photo blog to celebrate making new food grow!

Lettuce seedling
 
We are now one week into this 31 day challenge and on the first day, I made some mini-propagators by recycling plastic cartons. I sowed some peppers in one and lettuce/salad leaves in another. The above is a photo of the very first lettuce seedling to pop its head through to prove there is still life in the old seeds. (Blog post here)
 
Vegetable scraps
 
During February, we did the 28 Days of Extreme frugaling and decided to have a go at making the end of the cabbage take root and grow some new cabbage.

Red cabbage in pot of water
 
I started this experiment off on 17th February, I set the leftover part of the red cabbage into a small jar of water then had to replace the jar with a tin. (I needed said jar for my mini macramé hangers.) (Blog post here)
 
Tiny shoots beginning to appear

Three weeks into the experiment and I can already see signs of the red cabbage beginning to form new leaves - isn't this amazing?


Tiny new red cabbage growing from old one

A closer look at the tiny new cabbage leaves beginning to emerge from between the old leaves. I am totally fascinated by this ability to regrow vegetables. I have done this with my spring onions and celery in the past but had never tried a cabbage until now.


Roots beginning to grow from red cabbage base

A look at the base shows a multitude of new roots forming. I have now sat my green cabbage in a bowl of water and will be keeping it that way from now on, cutting off what I need and then replacing it in the water. This method worked well in the past with lettuce, too!

I haven't had any time to craft anything today as I had quite a bit of web work I wanted out of the way before the weekend, but I did manage to pop out into the garden and sow the rest of the peas and beans - a few had already germinated while they were soaking, so I decided I'd do the same with my sweet pea seeds and see if I can achieve some success this year. Two years ago, my sweet peas were quite spectacular but last year not a single one grew when I sowed them straight into the ground.

NYK, Frugaldom

Monday, 3 March 2014

Day 3 of Making it in March - Mini Macrame Plant Pot Holders

Day 3 of 31 - Get Knotted!

 It's March, Spring is supposed to be in the air and the first flush of green can be seen along the roadsides, where snowdrops are still flourishing and daffodils are beginning to bud.

Keeping in mind that the only sun that gets into our house, at the moment, is a brief glimmer first thing in the morning, there is limited space for growing anything on the windowsills, unless... I hang the pots in the window so they catch every available ray!

Having sourced an excellent online guide to help me refresh my memory of knotting string, something we did a great deal of up until the late 90s, when I was still making hay nets from baling twine, I set about making myself a macramé pot hanger. Trouble was, I didn't have any string, so I had to use wool.

 
 This first type of wool, a really chunky type, turned out to be too thick for making a delicate, mini-pot holder, so I ended up using a small tin, instead. This is going to be used to sow half a dozen cherry tomato seeds. Once (if) they germinate, they can be transferred to a tin each until large enough to harden off for repotting in the greenhouse.
.
Remember the plastic lid I saved from the can of cream?
 
My next hanger was of a much more delicate nature - made from embroidery thread. This was relatively quick and easy to make, so I shall be making several of these and they can be suspended from a rail held across the window by the existing cup hooks that get used for holding the thermal blind in place during winter. For the photo, this one had been hung from the door handle but I now have one each side of my window - not sure what the neighbours will think of this! :)

Money Plant (Jade Plant) cutting
As you can see, I have planted a Jade/Money Plant cutting into this carton and, with luck, it will flourish and be strong enough to go to its new home in a few weeks - Anne, this one has your name on it.

I have made 2 of the embroidery thread macramé pot hangers so far but am planning on making a kaleidoscope of colours to hang in the windows - with the embroidery threads, I can colour co-ordinate to match or contrast the décor and decorate the pots accordingly.

The tutorial on the Tuts+ website, which is what I used, is very simple to follow - all you need are the items shown in my first photograph. Even at that, you could simply use a piece of board and a bulldog clip or clothes pegs to hold the string in place while you work.

Have fun making mini macramé pot holders - if my ducks ever start laying again, I shall replace the pots in mine with egg shells for my seedlings.


Guess I'd best go make supper now - frugal chicken fajitas, anyone?

NYK, Frugaldom

Sunday, 23 February 2014

Day 23 - Feeling the Frugal Need for Seed - Sweet Peppers and Garlic

Whether you prefer Sewing or Sowing, they're both Frugal.


Remember these from earlier this month?

They are the seeds from the middle of the sweet peppers that I saved. They have been drying out on paper towel in their plastic tub for the past couple of weeks but seeing as I'm more in a sowing mood than a sewing mood, I decided to get them started and find out if any of them will grow. I can see no reason why they shouldn't, as similar experiments in the past have worked. Grand daughter's apple pips and peach stone from 2007(ish) are still growing, albeit it very, very slowly, out in the garden.

Empty plastic food containers

Planters - recycled food containers and trays make great planters and plant pot holders or drip trays! If there are no holes in the base of your planter, sit it on a folded tea towel or similar and pierce drainage holes using a sharp knife, awl, skewer or screw driver. Do not put holes in the tray, this is for catching drips or surplus water.

Compost and seeds

Half fill your tub with fine soil or compost and water it before sprinkling your seeds over the top. Don't worry if it looks too many, we aren't going to keep them all if they grow, only the strongest and healthiest. Cover these with a fine layer of compost or, if you have any available, vermiculite.

Homemade mini-propagator

Close the lid of your tub or else, as I have done, sit another similar tub over the top to allow growing space, making sure there are air vents - these types of tubs normally have air holes already in them - and hey presto! You now have a tiny windowsill propagator that will help protect your seeds and hopefully encourage them to grow. Don't forget to label your seeds - I am using a little piece of card with seed type written on one side and the date they were sown on the other.

All we need to do now is keep an eye on the tub to ensure the contents don't dry out and wait patiently to find out if our seeds will germinate.

Good luck! You can try seeds from any you happen to save - sweet pepper, chilli pepper, tomato or even start off peas and beans. I have had very successful pea crops from plants grown from the dried peas taken from my broth mix. :)

Today I finally got around to planting the rest of my garlic. Better late than never, I say. This has all been planted from kitchen/cooking garlic bulbs. Here's the first lot that I planted before Christmas. I need some nice dry weather now to get out there and properly weed the bed. The wire mesh is to prevent the cat from using the raised bed as a giant litter tray!

My raised garlic bed

Today's cloves have been planted in a tub on the patio. These are the last of the kitchen garlic that I started off in a sealed polythene bag in the fridge:

Garlic cloves being sprouted in polythene bag in the fridge

These have been in the fridge for the past couple of months, so I'm hoping they'll be OK being transferred outside this late on in the winter. Like rhubarb seeds, they like a good dose of frost to get them going. With luck, I'll get sufficient from my frugal crop to avoid the need to buy any more after this year. Wouldn't that be great?

NYK, Frugaldom

Saturday, 22 February 2014

Day 22 of Extremely Frugal February - Tin Can Herb Garden

Day 22 - More Fun with Tin Cans

Possibly some of you will remember my bargain buy from my last visit to the 'big' charity shop that I made en route home from my adventures with grand daughter in October but for thosw of you who don't, or who haven't read the blog about it, I bought a set of Jamie Oliver tins containing herbs - three tins costing 5p each!

The tins each contain a packet of seeds - chives, flowering oregano and purple basil but it wasn't until today, when I looked at them more closely, that I noticed they had the Jamie Oliver name embossed onto the cans - posh frugal herbs, or what? I wonder how much the pack of 3 would have cost someone originally? More importantly, many thanks to whoever saw fit to donate them to the community's charity store. (To make your own, simply wash out an empty tin can and punch a few drainage holes in the bottom of it.)

I filled mine with some compost, sowed the seeds and then made my own labels for the tins in case I somehow manage to lose the little lollipop stick signs before the seeds germinate - Scruffy cat has been known to help herself to all sorts of things!


Planting the seeds left me with 'rubbish' in the form of 3 ring-pull can lids and they reminded me of something else we used to do in the past - homemade punched metal decorations and wind chimes. Hmm... it had been a while since making anything like that. If you've been with us on the challenges for long enough, you'll know we used to save the metal tomato puree (and similar) tubes for this purpose but most have, since, been changed to plastic of some description.


Starting with a really simple pattern, like a basic horse shoe, stamp your design out using something like an awl or a pointed end screwdriver. Ideally, you should have the pattern drawn or stuck on the reverse and stamp it from there, but I'm doing a rush job freehand here, just to try it.


My patterns are being stamped out using the end of a 'star' screwdriver - tin lids are quite thin nowadays, so it doesn't take too much pressure to make the indents without the need for hammering. Next, I raked out a piece of ribbon from my crafting stash and threaded it through the ring pulls. You can easily use any other materials for this - string, cord, card or even an old belt, if it is thin enough. Have you guessed what it is yet?


I haven't attached any backing to mine yet, but they are becoming the frugal version of horse brasses and I'll probably hang them outdoors. Ring-pull tin can lids can be fashioned into all sorts of designs and used for all sorts of creative ecoarts but they need responsible adults supervising all the stamping and cutting, as the edges can be razor sharp.

Another day passes and another day of spending escapes me - nothing bought today. Meals are all from stores by way of the breakfast porridge, the last of the bread toasted with cheese, tomato and pickle for lunch and tonight's meal is bacon, cabbage and potatoes, all cooked in the three-tier steamer. For added good measure, I threw a handful of the spicy chick peas in with the cabbage and added some extra pepper. And lest you think I had forgotten, these are the potato skins I am keeping to plant - that one in the middle should be sprouting from a pot in no time!

NYK, Frugaldom

Friday, 21 February 2014

Day 21 of Extremely Frugal February - Rustic and Shabby Chic!

Day 21 of 28 - Adding Some Rustic Tuna Tin Charm

Jade or Money Plant cutting in homemade tin can planter
It's not quite Feng Shui but the Jade plant, also known as 'money plant', is said to represent good fortune or prosperity, according to some Chinese traditions. It certainly has the ability to grow and flourish by way of multiplying into numerous cuttings and these, in turn, are gifted to others in the hope that they may prosper in their pursuit for frugal living.

The 'waste not, want not' ethos governs most things in a frugal lifestyle, just as decluttering means getting rid of all the things you no longer need, not just 'stuff'. Whether you sell it, give it away, delete it or recycle it, it's your choice, so long as it isn't binned unless absolutely necessary. This goes for all things - even plants!

This is my Jade plant, otherwise known as my lucky 'money plant'. Daughter found it in the bin while cleaning out the house she was about to move into around 5 or 6 years ago. The plant had obviously been knocked over and chewed by previous owner's dog, as the plastic pot is covered in bite marks around the edge - the soil had completely dried out, but the plant was still alive. This is the kind of gift I love my children bring me!

Homemade planter
I found an old mixing bowl and sat the rescued plant in it, gave it a drink and sprinkled some aquarium gravel around the bottom of it. It has been with me ever since and even survived being knocked off a shelf last year. The little pieces that got broken off got rescued and stuck in a pot of compost, then promptly abandoned over-winter in the plastic greenhouse.

Today, I repotted the first one and brought it indoors - it has a fine set of healthy roots and now has a lovely new pot holder! This little planter took all of about 20 minutes to make.

Here's how...

Tuna cans
Tonight's dinner, as you may already have guessed, included tuna - it was tuna pasta to be exact, cheap and cheerful. Empty tin cans have so many uses, from cookie cutters to pastry cutters, storage tins, ash trays, (yes, there are still smokers out there and I have to insist they step outside if they want to smoke while visiting Frugaldom), individual pie dishes and, of course, mini plant pot holders.

Materials needed for making a mini-planter
These are the materials I used to make my mini-planter. You don't need a hot glue gun, but I find mine handy for so many things and I did make it part of a money-saving challenge a few years back to cover the cost of this crafting investment.

  • Empty tuna tin
  • Twigs
  • Scrap card or stiff paper long enough to wrap around the can
  • Piece of string, rope, ribbon, cord or twine
I use the scrap of tin foil to prevent hot glue dripping onto the table, so ignore that. My card is a scrap of wallpaper, which I used to wrap around the tin, then I glued the twigs onto this. 

Before starting, trim all the twigs to roughly the same lengths and then begin gluing them around the edge of the tin. Next, tie the whole lot together, as this holds everything firmly in place until the glue is set. You could remove the string afterwards, but I chose to leave it in place.

Rustic look with natural twigs


The next bit isn't essential, but I thought it gave a better finish than just the base of the tin can. The only problem now is that my freebie microfibre cloth has a hole the size of a tuna tin cut out the corner of it! I thought this would be more absorbent for any drips that might result from careless watering of the plant.

Felt or fabric base
As well as being absorbent, the fabric base will help make this non-slip and prevent the tin from marking any wooden surfaces. 

That's it - your twiggy tuna can planter is complete and ready for its little pot plant and the plant can be anything you choose, even herbs for using in your kitchen. This one was made very quickly using a handful of twigs from my fireside basket - we keep all the twigs that blow down in the garden - but I will do a few more for my other cuttings and for sowing some early seeds indoors. You can use any size of tin available, so you are limited only by your own imagination.
Billy can savings pot
Tin can-dle light
I have to admit to having a bin bag filled with empty tin cans because they are so handy for so many things. These are a couple of the other items I have made in the past but there are still plenty more tin can creations to come later this year. I'll blog them as I do them to save confusion. 

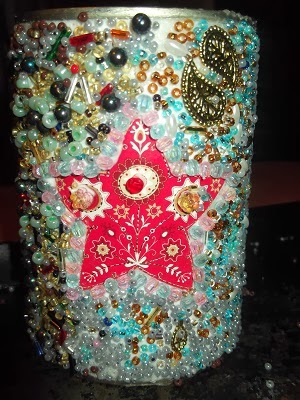
On the left is my 'blinged up' Billy can' and on the right, the first nail-punched Christmas lantern.

NYK, Frugaldom

Sunday, 2 February 2014

Day 2 of Extremely Frugal February - Free Seeds!

28 Days of Extreme Frugal Living

Day 2 of 28, I have spent £6.64 of my household budget and hopefully got the beginnings of some pepper plants.

Sweet Pepper seeds
Bit of a lazy Sunday here, although I did have a couple of visitors who stayed for tea and a natter. One picked me up a carton of milk on her way through the village, which accounts for my cash spend of the day, and the other brought me a gift of cheese and UHT milk, plus some gorgeous nail polish I had recently admired. In exchange for such gifts, I helped out with some book keeping, gave away some recycled folders for filing receipts and rehomed some old magazines. I love Sunday trading!
Today was Candlemas - not that we celebrate it in any way - so I had been weather watching, expecting the storms of recent to descend on us once again. As one of the sayings goes,
If Candle-mas Day is bright and clear,
There'll be two winters in the year.

However, the day dawned bright and stayed clear - if the old wives' tales and folklore are true, we have winter ready to make a ferocious return. I can already feel the temperature dropping since the rain clouds departed. It was 7 degrees C indoors this morning, it's now 15 degrees C after having the little stove burning all day. I stood firm against using any coal today. Was that extremely, I wonder?
DAY 2
Spending:
Paid friend for the milk she got me from the village store - £1.62 spent. I also asked that she buy it using a £10 note so I could do a simple swap and have change in the house because cash by way of spare change isn't easy to come by when you live in a rural location. I didn't want to dip into the coppers jar, nor would she have wanted 162 pennies! I gave her some gardening magazines to pass on to her dad, who always appreciates a look at these after I'm done with them. I get them given to me from another neighbour whose greenhouses I look after whenever they're on holiday.
Heating:
Only Wilbur, our little pot-bellied stove, has been lit today, so 'he' has probably consumed around £2.50 worth of logs. I was vigilant and used the stove top for boiling kettles of water and for making pots of tea while visitors were here, then cooked tonight's dinner over it.
Eating:
Porridge for breakfast, cooked, as usual, in the 700w microwave for 5 minutes and costing 12p for 2 people.
Lunch was a sandwich with homemade bread and hedgerow jelly. I'm not too sure how to price this, as all the fruit and berries used in the jelly making are foraged for free locally. I guess with sugar bought at 75p per bag, it might cost around 25p per jar to make, so pennies per serving plus allow about 5p for bread - we'll call it 20p for lunch for 2.
Stove top cooking
Dinner is another chicken fillet (£1) diced and spiced using some free seasoning I got with my last MuscleFood* order. (My friend referral link will automatically give you 4 free chicken fillets with your first order.) Peppers cost me 99p/3 from Approved Food*, so I used half a red and half a green (33p) in tonight's meal, along with the remainder of the mushrooms I got from a neighbour. I do return the favours - I supply the neighbour with hen and duck eggs when the feathered friends are laying plus fresh herbs from the garden and she supplies me with freshly baked cakes, newspapers for recycling and any little bits and pieces she can't cook before it spoils. It's a great set-up and one shared by several of us about here. I also had some leftover boiled potatoes that I had popped into the fridge on Friday night, so these went in with everything else to create what I call 'frugal bowl food' - a mishmash of flavours served in a big bowl.
We have drunk much more tea than normal today. It is loose leaf tea that was being cleared at 40p per 500g bag from Approved Food, so I bought 6 bags of the stuff in the hope that it will last the best part of 2014. It's not like dried tea leaves will go off if they're kept sealed, is it? I did the same with coffee beans, but bought 10kg of them. I reckon it costs us about 2p per cup of tea, although H takes sugar in his, so that costs an extra 4p per cup! Average is 3p, so I shall allow 36p including milk for all the tea that has been drunk today!
Overall mealtime spends for the day - £2.01 including tea for guests plus another 30p for the packet of custard creams demolished while chatting, so £2.31
FREE SEEDS!
How extreme was my frugaling today? Well, having used up what I had left of a red and green pepper, I saved the middles from them and, with a bit of luck, these little seeds will grow into some lovely sweet pepper plants this summer. I'll keep you up to date on progress as soon as I get some of them germinated.
Today's extremely frugal February day cost a whopping great (edited) £6.64 plus the unseen costs of running your own home. I could have put my foot down and been extreme by not having shop-bought custard creams to save myself 30p but, like I say, I'm not all that extreme. Plus, I do love a bit of bartering while sitting catching up with friends, neighbours or family over a cuppa.

Edit: I had to come back and add another 21p to today's budget after H decided we needed pudding for supper - more homemade rhubarb crumble and custard! I should have put my foot down and said no, but as a mere house-sharer, I can't really do that.
NYK, Frugaldom