Day 21 of 28 - Adding Some Rustic Tuna Tin Charm
 |
| Jade or Money Plant cutting in homemade tin can planter |
The 'waste not, want not' ethos governs most things in a frugal lifestyle, just as decluttering means getting rid of all the things you no longer need, not just 'stuff'. Whether you sell it, give it away, delete it or recycle it, it's your choice, so long as it isn't binned unless absolutely necessary. This goes for all things - even plants!
This is my Jade plant, otherwise known as my lucky 'money plant'. Daughter found it in the bin while cleaning out the house she was about to move into around 5 or 6 years ago. The plant had obviously been knocked over and chewed by previous owner's dog, as the plastic pot is covered in bite marks around the edge - the soil had completely dried out, but the plant was still alive. This is the kind of gift I love my children bring me!
 |
| Homemade planter |
Today, I repotted the first one and brought it indoors - it has a fine set of healthy roots and now has a lovely new pot holder! This little planter took all of about 20 minutes to make.
Here's how...
 |
| Tuna cans |
 |
| Materials needed for making a mini-planter |
- Empty tuna tin
- Twigs
- Scrap card or stiff paper long enough to wrap around the can
- Piece of string, rope, ribbon, cord or twine
I use the scrap of tin foil to prevent hot glue dripping onto the table, so ignore that. My card is a scrap of wallpaper, which I used to wrap around the tin, then I glued the twigs onto this.
Before starting, trim all the twigs to roughly the same lengths and then begin gluing them around the edge of the tin. Next, tie the whole lot together, as this holds everything firmly in place until the glue is set. You could remove the string afterwards, but I chose to leave it in place.
 |
| Rustic look with natural twigs |
The next bit isn't essential, but I thought it gave a better finish than just the base of the tin can. The only problem now is that my freebie microfibre cloth has a hole the size of a tuna tin cut out the corner of it! I thought this would be more absorbent for any drips that might result from careless watering of the plant.
 |
| Felt or fabric base |
As well as being absorbent, the fabric base will help make this non-slip and prevent the tin from marking any wooden surfaces.
That's it - your twiggy tuna can planter is complete and ready for its little pot plant and the plant can be anything you choose, even herbs for using in your kitchen. This one was made very quickly using a handful of twigs from my fireside basket - we keep all the twigs that blow down in the garden - but I will do a few more for my other cuttings and for sowing some early seeds indoors. You can use any size of tin available, so you are limited only by your own imagination.
 |
| Billy can savings pot |
 |
| Tin can-dle light |
I have to admit to having a bin bag filled with empty tin cans because they are so handy for so many things. These are a couple of the other items I have made in the past but there are still plenty more tin can creations to come later this year. I'll blog them as I do them to save confusion.
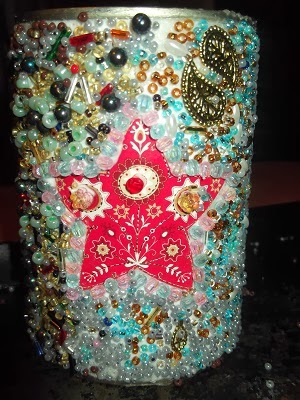
On the left is my 'blinged up' Billy can' and on the right, the first nail-punched Christmas lantern.
NYK, Frugaldom


Someone told me to put three coins under a money plant pot, not sure why, except they might come in handy for something!
ReplyDeleteI have one problem with my money plant it is HUGE. Think I should break off some bits and spread the luck around.
I definitely think you should help share the love for money plants. My cuttings rooted with no help whatsoever. :)
DeleteLove plants but not in the house.........
ReplyDeleteThree coins together, also represent good luck and prosperity so I think this means you are doubling up on the luck by putting them under the Jade plant
ReplyDelete