Showing posts with label homemade gifts. Show all posts

Monday, 21 December 2015

Homemade Marzipan Fruits

It's the final countdown! Winter solstice has arrived, we're about to see out the shortest day of the year and Christmas is almost here! Today I made snow sprinkled marzipan berries, a clove pomander and a cinnamon & berry horseshoe garland.


snow cat

Anyone remember the great snow of March 2013 when we were snowed in with no power for several days? I do, because we went out and decorated around our lane with snow animals, snowmen and snow-writing. This was our smiling snowcat. I hadn't thought much more about it since then until this arrived through the postbox of Thrift Cottage:

snow cat card

One of my neighbours, who does not know that we made the snow creatures, had been and taken photos. Low and behold, my snow cat has gone down in history on the front of a charity Christmas card! smiley

crocheted snowflake

This beautifully crocheted snowflake also arrived in the post, a gift from a lovely member of our frugal forums who was kind enough to make several of us these lovely gifts. This was much appreciated and is now hanging on the tree here.

Mini hot chocolate pots

I managed to get a hold of a few baby food jars, thanks to my daughter resorting to shop bought meals for youngest grandchild, who has just cut his first tooth in time for Christmas. Daughter usually makes and purees her own bay food but Christmas preparations, three young children and a business to run means time is short, so short cuts are sometimes essential. But the outcome is that frugal gran gets a few tiny jars that are just big enough to hold two servings of instant chocolate and mini marshmallows for a couple of friends and neighbours.

The wee room at Christmas

I found this really great, metre high Santa Claus for 99p and decided that it would be fun to hang him on a door. I think it's easy to guess which room lies behind this particular door that has Santa hanging around cross-legged.

HOW TO MAKE MARZIPAN FRUITS

I usually make an assortment of marzipan fruits - oranges, apples, bananas - but this year I decided to make snowy berries. I used one pack of marzipan, a little red food colouring, cloves and a sprinkle of icing sugar.

marzipan fruit

I used a 400g pack that had been reduced to 99p and got 30 individual cherry-sized Christmas berries out of it. I tore it into strips then broke off enough to roll into marble-sizes balls.

home made marzipan fruits

OK, so two of them accidentally vanished during the rolling of the balls but that's what happens when you push back lunchtime to fit in a few more jobs.

homemade marzipan fruits

Usually, I would use several colours of food dye here to create rosy apples, oranges and bananas but I was really short of time and had run out of quite a few food dyes, so I used red and made cherries, or berries, whichever you prefer to call them. I just rolled the marzipan balls around in a dish with some food colouring then stuck a clove into each to represent the stem. Leave then to dry off on a piece of kitchen paper.

homemade marzipan fruits

Once dried, I sprinkled them with sifted icing sugar to give them a snowy effect. These make lovely little gifts packaged up in fours or else left out for guests at Christmas or new year.

My cloves were getting very dry and brittle, so I thought I'd use some more of them up before they began crumbling. Being traditionalists here, we always have a tangerine at the bottom of the Christmas stockings, so it's the one time of year I have these in - except this year it is satsumas, so I used one of them and made a mini pomander.

citrus clove pomander

I started it off with a criss-cross pattern but then ended up filling in all the gaps to use up more of the cloves. It smells very Christmasy and festive. Next to add some cinnamon to the festive aroma that is now wafting through the house.

festive lucky horseshoe

I cut some berries from one of the shrubs at Frugaldom last time I was over and have had them hanging up to dry. I have now snipped off a small bunch and added, along with some small cinnamon sticks to an old horse shoe and tied it up using garden wire and recycled string. I just need to cut a little piece of holly and ivy to complete this but it was too dark by the time I'd finished all my tonight's jobs.

That's my day done - I am off to have my hot chocolate and marshmallows, grab my knitting and plonk myself in front of tonight's comedy film. Tomorrow the Christmas guests begin arriving and I still have a huge list of things needing ticked off my never-ending list. At least when we are this busy, we have no time to spend!

Frugally festive best wishes to you all! Don't forget our 2016 frugal living challenge thread has been opened at www.frugalforums.co.uk and you can now join us as an official 'Friend of Frugaldom' at www.frugalshop.co.uk if you would like to take advantage of our frugal holiday accommodation in the future.

Traditional Clootie Dumpling or Microwave Clootie Dumpling

The festive season is upon us and it's almost time to make the traditional Scottish clootie dumpling - but has anyone tried the super-fast, easy recipe for microwave dumpling?


Traditional Scottish Clootie Dumpling

Every year, we have a family tradition of serving clootie dumpling as part of the Christmas day meal. This year will be no different, but dumpling making has already begun, because I need to cook at least three of them. Our recipe has been handed down 5 generations of the family. The first dumpling was made yesterday, by traditional methods. You can find the recipe for our traditional Scottish clootie dumpling on the Frugaldom blog.

Yesterday's dumpling was made for another family member, so I still need to make on for this household but these take at least 3 hours each to make, as I have only one large pan and no standard cooker, just the mini cooker with hot plates or the log-burning stove. But what happens when you make a dumpling? That dumplingy aroma wafts throughout the house and ignites the taste buds into a stat of wanton disregard for dieting, meal planning or even patience! So a quick search for speedy dumpling found this microwave clootie dumpling recipe.

microwave clootie dumpling

I melted the sugar, margarine, spices and milk then simmered the sultanas in the mix for a few minutes but was in far too much of a rush to allow it to cool, so it got mixed with the plain flour, bicarbonate of soda and beaten egg. I used only half the amount quoted, as there are only two of us here until Tuesday and, unlike traditional clootie dumpling, I don't think this variety will freeze. The above is what it looked like when I poured it into a microwave-safe bowl, which had been lined with plastic food film. (Not too sure I like the plastic film, I will try without this next time.)

microwave clootie dumpling

I cooked mine in the microwave on high for four and a half minutes and this was enough to bake it through. It turned out of the bowl without any problem and smelled like spicy dumpling.

microwave clootie dumpling

Unlike traditional clootie dumpling, which gets boiled in a cloth for over three hours and then grilled or toasted to dry the sweet, leather-like skin, this variety contains eggs and has no skin, so the texture is more of a spongy soft fruit pudding, not the easiest thing to slice when serving. But it does smell really good and we do like our puddings in the household.


In true frugal living fashion, a hot pudding usually gets served with custard, so here is the finished dish. Overall, this version of clootie dumpling cost me approximately 40p to make (double up if making fullsize) and by the time you add on some custard you are looking at around 60p for something that easily provides for 6.

Tonight we cheated - instant packet custard made with boiling water and 'dumpling' made in under half an hour via the microwave... cheap and cheerful, frugal and festive, hot and tasty!

Let me know if you try this really frugal microwave clootie dumpling recipe. For my personal preference, I would use less spice next time but there will certainly be a next time. I wouldn't call it dumpling, as such, it being more of a spiced fruit pudding, but it certainly makes an excellent substitute for occasions when you simply don't have a spare 3 or 4 hours to hang around the kitchen.

Friday, 21 February 2014

Day 21 of Extremely Frugal February - Rustic and Shabby Chic!

Day 21 of 28 - Adding Some Rustic Tuna Tin Charm

Jade or Money Plant cutting in homemade tin can planter
It's not quite Feng Shui but the Jade plant, also known as 'money plant', is said to represent good fortune or prosperity, according to some Chinese traditions. It certainly has the ability to grow and flourish by way of multiplying into numerous cuttings and these, in turn, are gifted to others in the hope that they may prosper in their pursuit for frugal living.

The 'waste not, want not' ethos governs most things in a frugal lifestyle, just as decluttering means getting rid of all the things you no longer need, not just 'stuff'. Whether you sell it, give it away, delete it or recycle it, it's your choice, so long as it isn't binned unless absolutely necessary. This goes for all things - even plants!

This is my Jade plant, otherwise known as my lucky 'money plant'. Daughter found it in the bin while cleaning out the house she was about to move into around 5 or 6 years ago. The plant had obviously been knocked over and chewed by previous owner's dog, as the plastic pot is covered in bite marks around the edge - the soil had completely dried out, but the plant was still alive. This is the kind of gift I love my children bring me!

Homemade planter
I found an old mixing bowl and sat the rescued plant in it, gave it a drink and sprinkled some aquarium gravel around the bottom of it. It has been with me ever since and even survived being knocked off a shelf last year. The little pieces that got broken off got rescued and stuck in a pot of compost, then promptly abandoned over-winter in the plastic greenhouse.

Today, I repotted the first one and brought it indoors - it has a fine set of healthy roots and now has a lovely new pot holder! This little planter took all of about 20 minutes to make.

Here's how...

Tuna cans
Tonight's dinner, as you may already have guessed, included tuna - it was tuna pasta to be exact, cheap and cheerful. Empty tin cans have so many uses, from cookie cutters to pastry cutters, storage tins, ash trays, (yes, there are still smokers out there and I have to insist they step outside if they want to smoke while visiting Frugaldom), individual pie dishes and, of course, mini plant pot holders.

Materials needed for making a mini-planter
These are the materials I used to make my mini-planter. You don't need a hot glue gun, but I find mine handy for so many things and I did make it part of a money-saving challenge a few years back to cover the cost of this crafting investment.

  • Empty tuna tin
  • Twigs
  • Scrap card or stiff paper long enough to wrap around the can
  • Piece of string, rope, ribbon, cord or twine
I use the scrap of tin foil to prevent hot glue dripping onto the table, so ignore that. My card is a scrap of wallpaper, which I used to wrap around the tin, then I glued the twigs onto this. 

Before starting, trim all the twigs to roughly the same lengths and then begin gluing them around the edge of the tin. Next, tie the whole lot together, as this holds everything firmly in place until the glue is set. You could remove the string afterwards, but I chose to leave it in place.

Rustic look with natural twigs


The next bit isn't essential, but I thought it gave a better finish than just the base of the tin can. The only problem now is that my freebie microfibre cloth has a hole the size of a tuna tin cut out the corner of it! I thought this would be more absorbent for any drips that might result from careless watering of the plant.

Felt or fabric base
As well as being absorbent, the fabric base will help make this non-slip and prevent the tin from marking any wooden surfaces. 

That's it - your twiggy tuna can planter is complete and ready for its little pot plant and the plant can be anything you choose, even herbs for using in your kitchen. This one was made very quickly using a handful of twigs from my fireside basket - we keep all the twigs that blow down in the garden - but I will do a few more for my other cuttings and for sowing some early seeds indoors. You can use any size of tin available, so you are limited only by your own imagination.

Billy can savings pot
Tin can-dle light
I have to admit to having a bin bag filled with empty tin cans because they are so handy for so many things. These are a couple of the other items I have made in the past but there are still plenty more tin can creations to come later this year. I'll blog them as I do them to save confusion. 

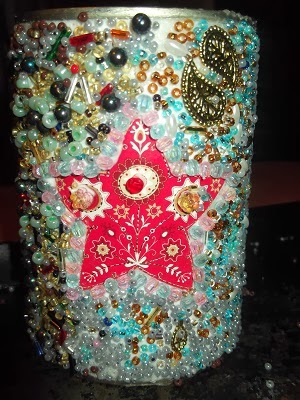
On the left is my 'blinged up' Billy can' and on the right, the first nail-punched Christmas lantern.

NYK, Frugaldom

Thursday, 30 January 2014

Shaggy Rag Rug Adventures

Frugal Rag Rugs

Several years ago, I began making myself a little rag rug using a piece of hessian cut from a peanut sack and some spare fabric from curtains and pillow slips.
 
I had great plans of completing before moving onto something more adventurous.
 
I photographed it.
 
I blogged about it.
 
I never finished it because I gave it to a neighbour who needed something to cushion a rock beneath her garden pond so it didn't rip the liner.

That was in February 2010 and this is now almost February 2014. Making my rug has been on my 'things to do' list for quite some time, so I decided, in October 2013, that this would be the year of the frugal rug and perhaps I could even encourage a few others to join in the fun; I bought 5 metres of brand new hessian/jute from a seller on eBay. (It cost less than £10 including delivery.)
 
28th January 2014
This week, despite having so many other things to do and yet still managing to avoid doing them, I cut a 2 metre length of the hessian and decided it was now or never! I started my rug on Tuesday 28th January 2014. As you can see, I have no fancy tools. I have half a wooden clothes peg sharpened to a point and used as a prodding tool.
 
This is going to be a mammoth task but it is one that I am going to derive much pleasure from over the coming months, or perhaps even years!
 
To begin with, I folded the jute in half then folded it again so I
29th January 2014
could easily mark the centre point. In that centre, I drew my magic circle that will lead me to my final destination - the completion of the rug. I have all sorts of stories and pictures in my head that I won't woven into this piece, but I think starting with a yellow circle is a good way to go - it represents the sun. I love geometric shapes and mosaics, I love patchwork and random colours, I love life unfolding to tell its own story, rather than trying to lay out a basic format from start to finish. My grand daughter may want to help, friends or other family members may want to add a few rags of their own, so each little part will have its own story to tell.
 
30th January 2014
Next, I added four more circles, each with a smaller circle within it, to represent earth surrounded by whatever you want to imagine - sky, water, wind, atmosphere - this will be a rug that will have the ability to make people imagine all sorts of possibilities. Four more circles of mixed greens and reds represent anything you want them to - life and love, perhaps.
 
Yesterday, someone sent me a pretty picture of a unicorn, so I have now drawn rearing unicorns on either side of my centre piece.
 
30th January 2014
The unicorns will take a bit of prodding to get them looking anywhere near how I would like them to look, but I'm in no hurry and am enjoying working on this project. They make me think of folklore and fantasy, conjuring up images of flowers, rainbows and mysticism, so who knows where that could lead. Perhaps I need some trees and birds, too.
 
The first unicorn, 30th January 2014
The unicorn is coming along slowly, I don't think it's too bad for a first attempt. I have almost finished the navy material I'm using to edge it, so I'll move to green for the bottom half.

I'll add more photographs as the rug progresses but I can tell you now, I have no pre-conceived ideas about how this will eventually look - it really is a crafting adventure into the unknown. It's a work in progress and the final design will be reflect life as it happens, chats with friends and memories recalled during the making of this rug. One day, it might take pride of place in the living room and stay with me to become a family heirloom but, equally, it could simply become a homemade gift for someone else.
 
NYK in Frugaldom

Tuesday, 17 December 2013

How to Recycle Jam Jars into Frosty Lanterns

Frugal, Festive Fun for all the Family - Making Snowy Lanterns as Christmas Decorations


Frosty snowman tea-light candle lantern

A photo-blog post about what I've been doing in Frugaldom this morning. (Responsible adult supervision recommended.)

What you need
  • Tray, board, cloth or box
  • Soda crystals, otherwise known as washing soda
  • PVA glue
  • Paintbrush
  • Some old glass jars for recycling
  • Scrap cardboard, paper, tin foil, ribbon, buttons and/or felt

Items needed for snowy lantern making

Clear a flat surface and carefully pour a layer of soda crystals into your tray, box or onto your board or cloth.

Tray of soda crystals - this will be your snow
Prepare your glue and brush, ready to decorate your first frosty jar by painting it entirely with the PVA glue.

Paint the entire jar with glue

Next, roll the jar in the soda crystals, as per the following photo. Tap it gently a few times once it is completely covered, just to dislodge any loose salt crystals.

Roll the pre-glued jar in the soda crystals

Next, tie or wrap a piece of ribbon, tin foil, string or similar around the neck of the jar, making sure it doesn't overlap the top and create a fire hazard. Congratulations! You are finished your first frosty lantern! Once the glue has fully dried, carefully sit the jar somewhere safe and light a candle inside it.

Frosty tea-light candle lantern
Now for your frosty snowman lantern.

Glue on 2 eyes, a nose and a smile. I have used a slither of leftover felt as a scarf, but you could use anything that you have available, as long as it won't melt when you light a candle inside the jar.

The start of my frosty snowman lantern
For the snowman's buttons and smile, I cut small pieces from some junk mail that came through the letterbox - it's always good for something when it's not being used to light the fire.

Scrap paper or card does equally well for faces, scarves and buttons
 Don't worry if your snowman is looking a little grim and untidy - I made such a mess with the glue that it all popped through the button holes and I had to stick little bits of paper over the top of them!

Frosty snowman tea-light lantern taking shape
I didn't have anything suitable for making my snowman a hat, so I just wrapped some black yarn around the top - remember to always leave the jar open and don't let anything overlap the opening, where it could easily catch fire! (If I get around to making him a hat, I'll update the post with another photo.)

Almost ready for his frosting
 Now it's time to paint the rest of the jar with glue. You don't need to be too particular about this as he is, after all, going to be a frosty snowman.

Paint the rest of the jar with glue
Next, you simply sprinkle the soda crystals all over the snowman or else roll it through the crystals in your tray or box.

Frosting the snowman
Finally, once the glue has dried, carefully light your candle and set your frosty snowman lantern some place safe, out of the reach of children or pets.


Frosty snowman tea-light candle lantern
Have frugal fun recycling your old jam jars this Christmas... putting together a kit for a DIY version is also a great gift and costs very little. Soda crystals are currently around £1 for a kilo bag and that's enough to make a huge number of lanterns. (I just used some from the bag I keep for my homemade laundry liquid.)

Feel free to experiment and please consider sharing photos of your finished creations on www.frugalforums.co.uk in our Arts, Crafts, Hobbies and Fun Stuff section.

Sunday, 24 November 2013

Preparing for Sharing the Fun and Frugal Festivities

One Month until Christmas!

2014 is fast approaching and we can now look forward to the final throws of 2013, all prepared for festive feasting and frugal fun, safe in the knowledge that the Christmas shopping is all done, dinner is planned and paid for, all the fabulous gifts you bought for others have been wrapped, cards written, the Christmas cake baked and not a penny of debt incurred. All that remains is to put up the tree and get the decorations hung!

No? Not sound like your household? Phew! Because it certainly doesn't sound like mine and I'd hate to be alone with my wild seasonal thoughts!

What stage have you reached in the proceedings? I do know that I've had the best part of 50 years to get accustomed to the fact that Christmas happens every December, followed a week later by the arrival of the new year, but why am I always in such a chaotic state of non-preparedness?

What have I been doing with all my time in Frugaldom?

  1. I made two dozen Ozzy Blackbeard Knitted Christmas Puddings (that's one of them in the photo at the top) using scraps of wool from my stash. I used a tiny bead as a berry on the first one but then decided it was easier to simply sew a couple of stitches of red wool on top. I had a little bit of green felt, but you could also knit the leaves, if you followed Fibrefable's free pattern. These will be used to gift wrap individual chocolates, meaning that one box can be split among friends and family as cute little gifts or Christmas table favours. Ferrero Rocher, anyone? (Sadly, our local store doesn't have Ferrero Rocher, so I'll need to try and source these from elsewhere.)
  2. I used up some oddments of red and white wool to knit little Santa hats, making up the very basic pattern as I went along by knitting a row of plain then a row of purl and decreasing to create the size needed. The small will be used to cover bottle tops on the homemade 'pink champagne' and the larger one is for covering a chocolate orange. (Sadly, our local store doesn't have any Terry's Chocolate Oranges, so I'll need to try and source these from elsewhere.)
  3. I tried first knitting and then crocheting little owls for hanging in the tree, as I love what's known as amigurumi and want to make a load of these for the younger members of the family. Next, I'm going to make the mini hedgehog, using the simple to follow, free patterns posted on the Knitted Toy Box blog. The free crochet patterns are on the Romansock blog, which I also love - fluffy bunny, anyone? So many things to knit with such a dwindling supply of DK! (Sadly, our local store doesn't sell yarn, so I need to replenish from elsewhere.)
  4. Cinnamon Sticks - I have treated myself invested in a pack so I can make cinnamon candles, scent some winter spiced potpourri and spruce up a homemade Christmas wreath for the door. I opted for the eBay offer of 20 x 8cm for £2 including postage and packaging. At 10p each, that's about the best price I could find and there are also the Nectar Points I collect while shopping there. In fact, I think this was a double points weekend. (Sadly, our local store doesn't sock anything as exotic as cinnamon sticks, so I needed to source these from elsewhere.)
  5. Christmas Holly Wreath - I splashed out £2.45 for  5 x 10" wire wreath hoops, again via eBay,  taking advantage of free delivery and double Nectar points this weekend. We have plenty of foliage in the garden, including holly, plus I have a box of assorted ribbons, bows and shiny baubles in my crafting stash. Add to this some dried cones, the cinnamon sticks, some fine plastic coated garden wire and anything else I can lay my hands on that represents itself with a hint of festive colour or texture, I will have a very frugal, homemade holly wreath for my front door.
  6. Christmas shopping! It hasn't been much, so far, but I seem to take a somewhat different view to the current belief by many that Christmas is nothing more than a hyped-up, consumerist-driven spend fest. Yes, I agree that it can be, especially when people go crazy, making rash, OTT decisions about how much money to spend regardless of how little they can really afford. or worse still, when that competitive spirit suffocates the festive spirit. I mean, really! What is that all about? If someone in a family earns £50k a year and another earns £5k, who in their right mind would expect similar value gifts to be exchanged? In fact, who expects reciprocation in the first place, if one tells the other that there will be no gift exchange this year? The gift of giving is a great one, so if any of your nearest and dearest state that they don't want to 'do' Christmas, it needn't stop you - just give their gift away to charity if they insist they want nothing. My shopping, so far, amounts to various smaller pieces of cumulative presents that will be put together by way of homemade hampers - made up in recycled cardboard boxes, not fancy wicker baskets!
  7. Planning the meal - I took the opportunity of buying fresh turkey while I had the chance of paying for it with free points. It's now in the freezer. My friend always makes braised red cabbage for us both and, by way of exchange, I give her a bottle of my homemade pink 'champagne'. This year, it's raspberry, blackberry and rhubarb.
  8. Bargain bagging with cash back, buy one get one free, free delivery and voucher codes. I splurged in the online Thornton's store! I think the normal price should have been much closer to £100 but with the *Topcashback voucher for free box of chocolates, a half price daily deal, a superb buy one get one free offer, the clearance bargains, the free delivery and the cash back from site and credit card, it came in at approximately £35 and enough luxury chocolates to share among the entire family. Christmas is about affording luxuries that you wouldn't normally even contemplate at any other time of year. Christmas is for frugalers doing what they do best - celebrating their financial achievements and savvy shopping in some most impressive ways.
  9. Preparing for the onslaught of a long and possibly harsh winter. I have all my candles to hand, the wind-up torch, the rechargeable clock radio, the stack of logs and the cupboards packed with some emergency supplies. I have practiced cooking most things on the stove top, so a period without electricity similar to last winter's shouldn't affect us too much. New woolly blankets are draped over beds and settee, fleece blinds in the windows, hot water bottle checked for leaks, matches to hand and the electricity meter topped up to the maximum in the hope of delaying the inevitable price hike that comes into play from 6th December. I have not fallen for the ridiculous posts that are circulating with the news that you can heat a room for 8p per day because this 'tale' is simply NOT TRUE! If you doubt my word, light a tealight candle and time how long it burns, then work out how many candles you'd need and at what cost, to last you a full day. The absolute cheapest cost at least 1p per hour to burn and produces sufficient heat to warm a cupboard.
  10. Preparing for next year's Frugal Living Challenge, which is run through www.frugalforums.co.uk but still has a subsidiary thread running in the Moneysavingexpert.com forums. 2014 will be year 7 of this challenge being open to the general moneysaving, budget-conscious public, so don't forget to join us soon.
Amidst all of this, of course, we are still progressing with the frugal renovation plans and the garden work. Just yesterday, the garden path was completed and I think it is looking great! It stretches all the way from the patio to the stream at the bottom of the garden. In place of weed suppressant, we have recycled builders' tote bags and in place of path edgings, we have logs. The logs worked out at approximately £1 per 3m length from the Forestry Commission. The gravel was our biggest extravagance, as we needed 6 huge bags of the stuff (with another 6 free tote bags, cut and laid beneath said gravel), but we are hoping that it will last a very long time and prove its worth, even if the lower section of path ends up under flood water!

Indoors, we almost had a living room but then plans changed again. The new backboiler is so good at heating the water that I've decided to incorporate another two radiators into the system, with one of those in the living room. Folks have asked why I would even need a radiator in my living room when that's where the open fireplace is, but when all that heat is roaring around a triple pass boiler and then up the chimney, I want as much of it circulating around the house as possible. This thing is hearing water at a rate enough to power 10 radiators and still heat a tank of water, so I'm now looking for a bath, rather than waste any hot water!

I'll tell you the story of the living room door in a later post!

Back on the Christmas trail, check out a few of the links at the bottom for recipes that include snowman soup, handmade chocolates and truffles, clootie dumpling, shortbread, homemade rhubarb champagne and other homemade gifts that we have tried over the years. I hope you can find something that catches your attention and brings a smile to someone's face over the coming weeks.

For those of you who like to make your own clootie dumpling and short read, we still have some of the exclusive November Challenge Frugaldom Fun and Food card sets available for sale. (All profits from November sales are for charity.) These include recipes for both of the above plus the instructions for making your very own papier mache, ready to begin the next year of frugal living, cost-cutting, budget stretching and debt busting.

On a sadder note, we have now learned that our nearest village post office is gearing down for closure soon. We'll still have postal service available in the village, by way of a counter in the general store, but to add to my woes, one of the two little general stores is closing. This is very sad but reflects how difficult it is for local shops to survive when most who can afford to prefer to jump into their cars and drive 40+ miles to the nearest big name supermarket. As a result, next year's grocery budget has had to be increased to £975 for the Frugaldom household to allow for the extra price increases that have already started to appear in the sole-surviving general store! I did promise to add in local store prices for the items I listed in last week's post about food prices, I will endeavour to do just that over the coming week. I can tell you now that a 2 litre carton of semi-skimmed milk cost me £1.62 this weekend. That's equivalent to 8.1p per 100ml. Checking on the 'mysupermarket' website, I see it costs 4.4p per 100ml in supermarkets, or £1 for 4 pints (2.27 litres).

I wonder if less food would be thrown away if everyone had to pay village store prices? Any thoughts on that, anyone?

NYK, Frugaldom

* My friend referral link

Monday, 3 December 2012

Pink 'Champagne' Style Fizz of a VERY Frugal Variety.

Champagne, Perry or Bubbly - Frugal Pink for Me!

 
With such a busy start to the month, I thought it best to get the frugal 'champers' on the go so we had some ready in time for Christmas.
 
I've no rhubarb left (other than frozen, pre-stewed for pies), so I'm using a mixture of fruits, meaning my 'pink champagne' may turn out to be a slightly darker shade of pink, verging on something resembling sparkling 'Ribena'.
 
Never mind, as long as it goes with a pop, fizzes and tastes nice, that is all that matters. I know there'll be Vitamin C in it, but not too much by way of alcohol. It's being started off as we speak!
 
CHRISTMAS 2012 LAST MINUTE 'CHAMPERS'
About half a kilo of mixed fruit (Free)
About half a kilo of sugar (50p)
1 sliced lemon (20p)
Splash of cider vinegar (1p)
3 litres water
 
I tipped three cartons of frozen fruit into my bucket - one each of blueberries, raspberries and blackcurrants - but didn't bother weighing the quantities.
 
To this, I added about half a bag of sugar, then a sliced lemon. I'm not a stickler for waxed or unwaxed as it seems to make no difference at all, from my limited understanding. In fact, a recent report actually suggested that the standard waxed lemons provide better flavour, so no point wasting money trying to source unwaxed varieties. Hopefully the lemon tree will grow and begin producing fruit over the next year or two, that would be handy!
 
Next was the water. I boiled the first litre and poured that over the top of the fruit and sugar, then added the next two litres, unboiled. It's warm enough to dissolve the sugar quite quickly. About a tablespoonful of vinegar was added and I used what I had available - cider vinegar. (The hens like it in their water.)
 
Job done! It's all been covered and is now sitting in the livingroom in its little bucket, infusing with flavour and alreay turning a pretty shade of pink. It will be left to soak until the weekend, but I'll give it a stir each day between now and then.
 
Come the weekend, the liquid will be strained, fruit set aside for some sort of pie filling or sponge topping and the resulting juice filtered off into my clip top bottles. I have three of those, recycled, of course, plus there are a couple of screw cap glass bottles that can be used. If my estimates are correct, I reckon it will cost 15p per bottle, including the electricity needed to boil the kettle.
 
I realise that this won't be particularly strong in the alcohol stakes, but a fortnight is sufficient time for the sugars to start fermenting and it does seem to work with almost every type of berry, edible flower or fruit I have tried.
 
Have fun if you try this at home, but don't forget to check the bottles for any signs of over-fizz, s pink isn't the easiest colour to get out of anything that happens to be in the way.
 
Until later,